Wireshark Tip: Make a Button for That!
- Laura Chappell
- Aug 13, 2024
- 2 min read
Have you created buttons for Wireshark yet? Buttons enable you to apply your favorite display filters to your trace files quickly. When you create a button, it is saved in the profile in which you are working.
In the example below, we have created a set of buttons for interesting DNS, TCP, ICMP, and HTTP packets. Our DNS, TCP, and HTTP buttons are organized under headings, while the ICMP button sits directly on the main Display Filter area line.

Step 1: Create a Display Filter
Buttons are based on display filters. To create a button, enter a display filter in the Display Filter area. In the example below, we have entered dns.flags.response == 0 in the Display Filter area.
Step 2: Click + to Create a Button
Now click the + to the right of the Display Filter area.

Step 3: Enter a Label and Comment (Optional)
A new area appears under the Display Filter area. You are prompted to enter the button label, display filter (filled out for you), and a comment (optional). In the example, I have added the label "Request" along with a short comment.

Click OK to save your button. By default, new buttons are placed to the right of existing buttons.

Create a Button Under a Heading
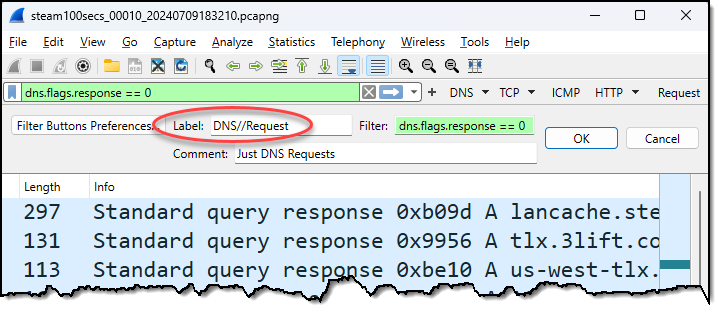
Our button is simply labeled Request - but it is a DNS Request - we want our button to be listed under the DNS heading.
Headings are created using the following syntax: heading//buton_label.
Right click on the new button and select Edit. Change your button label to DNS//Request.

Click OK.
Voila! Your button is now located under the DNS heading. When you want to see DNS requests, click the DNS heading and the Request button.

In the next blog, I will share additional methods for creating and sharing buttons.
Enjoy!
